Saturday, March 26, 2011

Kinematics Homework pg. 72

question 58 was a bit confusing....


(for some reason the picture doesn't appear but if you click it, the picture alone will appear)

Kinematics Graph Translations (lab results)

My original plan was to have my translated graphs placed after the computer given/walked graphs but this blog is very stubborn and will not let me and I have lost the energy to redo everything AGAIN, so here it is:


Graph 01b

Graph 01c

Graph 01d

Graph 01e


Graph 01f


Tuesday, March 8, 2011

Kinematics Graphs

Today, we used motion detectors and a graph program to do our lab activity. We were given graphs, either distance vs time or velocity vs time, and we had to walk them accordingly. Though I wasn't too excited to do this lab at first, due to all the graphs we had to "describe" as a pre-lab activity yesterday, my feelings had changed during and after the lab. To me, this wasn't just a lab, it was a game. It was a game to beat everybody else's ability to match the graph and make mine better. Though it seems like a childish goal, it was still something I felt I HAD to achieve. In the end, I had one amazing graph that was almost IDENTICAL to the given graph. I must say, I am quite proud of myself.
The black line represents the given graph that must be matched and the red line represents the graph that one has walked.
(for some reason, the x axis seems to have disappeared)
To walk these graphs, you would have to start at the given position (a certain distance away from the origin or from the motion detector) and walk towards or away from that origin. The velocity may be consistent or may increase/decrease and sometimes you may have to stop. These factors all vary as the graphs are different and have different variables. 

Right Hand Rules #1 and #2

Finding current and magnetism would be difficult without these visual, hands-on actions to help one solve the current and magnetism of conventional current flow for conductors (RHR#1) and coiled conductors/solenoids (RHR#2).
*note, all of these should be done with the RIGHT HAND, hence the name/title of these rules

RIGHT HAND RULE #1
Hold the conductor with the thumb pointing towards the direction of the conventional current flow (from +ve to -ve). The rest of your fingers should curl around the conductor and these curved fingers will point to the direction of the magnetic field of that conductor.
Current is represented by I and the magnetic field is represented by B.


RIGHT HAND RULE #2
Hold the coiled conductor with the rest of the fingers (meaning excluding the thumb) pointing towards the direction of the conventional current flow. The thumb should point to the direction of the magnetic field within the coil. On the outside of this coil, the thumb points towards the north pole of the electromagnet. This electromagnet follows the same lines of force/magnetic field lines as a normal magnet. The current flow from the north pole to the south pole in curved lines.


*NOTE:

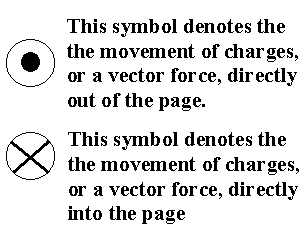
Therefore, when using this for RHR#1, point thumb towards you or away from you to figure out the magnetism.